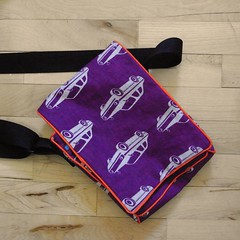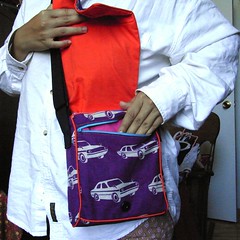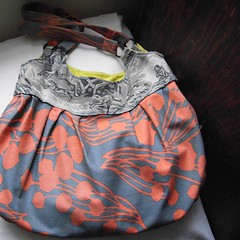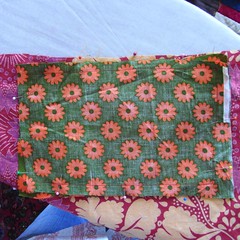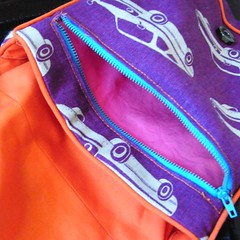
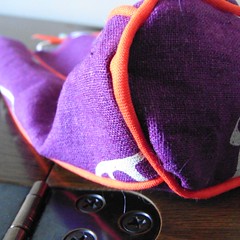
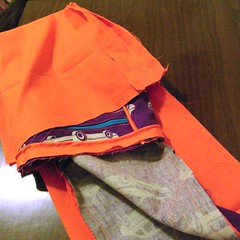
So I made this bag for Sweet Tea on Sunday, getting almost all the way through before realizing that the pattern of cars on the fabric would be upside down when the bag was closed! Curses! I decided that I was just going to insist that she carry it anyway. Upside down cars are cool, right?
Sweet Tea promised she would carry it anyway. She named it the
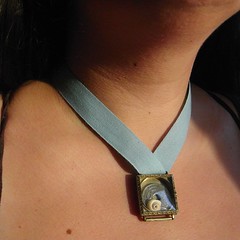
Boulevardier Bag, i.e. just large enough to carry the few things you might need when promenading on the boulevard. This bag is about 7"x8"x2" with an adjustable over the shoulder strap, a large interior pocket, a zippered exterior pocket, and a fold-over flap.
You will need:About 1/2 yard of fabric for bag outside.
(I used
Echino fabric that I got at Purl Patchwork)
About 1/2 yard of a different fabric for the lining
About 9”x10” piece of fabric for pocket facing
A 5” or 7” zipper
About 7’ of webbing
A square ring and a triglide for making an adjustable strap
A magnetic snap
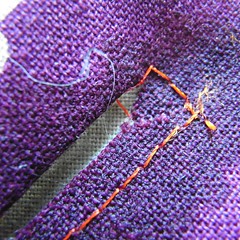
How to do it:1. Start by making the piping. You need about 140” of piping for the project. You don’t need to make a single 140” piece (this is basically impossible, considering the width of most fabric bolts). I did mine in about 45” lengths. The piping is optional, but I think it looks cool. If you want to skip the piping, just go ahead to step 2 and ignore any further directions about piping.
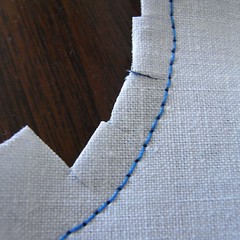
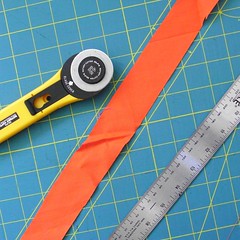
Cut the piping on the bias (this means at about a 45 to 60 degree angle from the direction of the woven threads). You want 5/8” seam allowance after the cord is sewn in, so the width of your strip should be a little wider than that. I used kitchen twine to fill my piping, so it only needed to be about 1 3/8 wide.
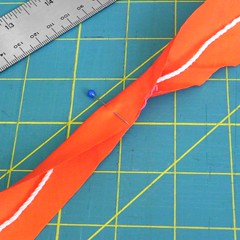
Then lay twine along the middle of the strip. Leave extra twine hanging out on both sides to make sure you don’t have too little of it. Pin the fabric around the twine.
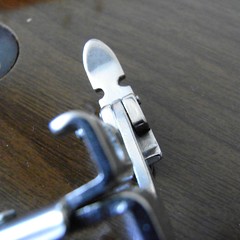
Now sew the fabric around the twine, keeping the seam as close to the lump of twine as possible. It is much easier to do this with a zipper foot:

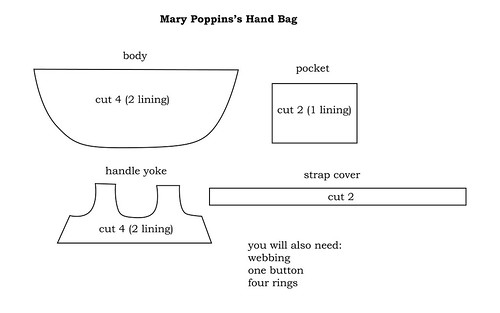
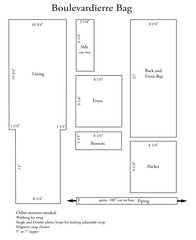
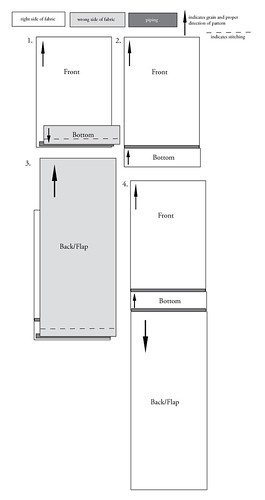
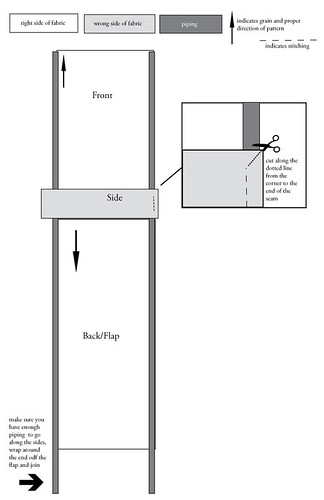
2. Next cut out the lining, outside and pocket facing. Here is my pattern with measurements. This pattern already includes 5/8” seam allowance for all the pieces. You can go to the flicker set and download a larger version:
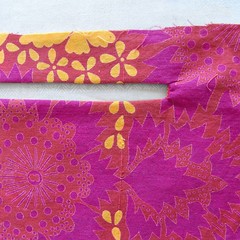
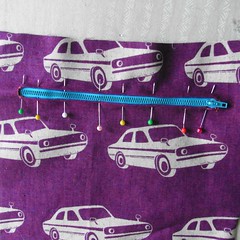
3. Now insert the zipper. You want to put it running horizontally near the top of the front piece. Measure the zipper from the top of the pull to the bottom of the stop. Now draw a line on the wrong side of the front piece that is that long. Now sew around the line to make a long narrow rectangle about 1/4” deep. Cut down the center of the box, starting in the middle, and make a Y shape at either end, going into the corners:
Press the raw edges of the cut under along the lines you just sewed to make a clean looking box:
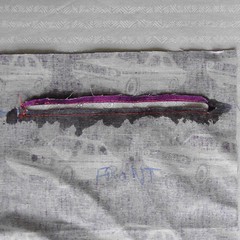
Put this box over your zipper and pin it down. Sew all the way around. Your zipper is now inserted.
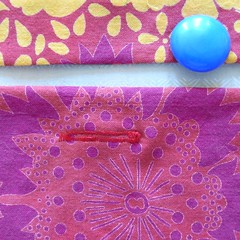
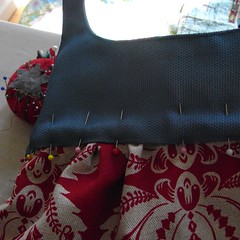
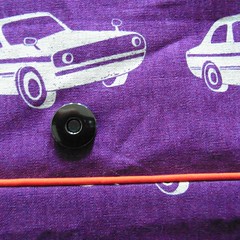
4. Now attach the indented part of the magnetic snap. Center it near the bottom of the font piece of the bag.
5. Next sew the pocket facing to front piece, right side of facing to wrong side of front piece:
6. Now you get to do the piping part. Attach the bottom of the bag to the front, sandwiching a piece of piping in between. The bag pieces are always sewn right sides together. The piping goes in between with the raw edge matching the raw edge of the bag pieces.
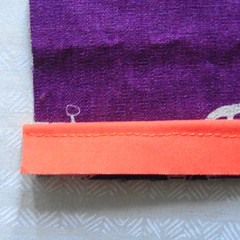
Sew as close to the lump of the piping as possible. You should be able to feel where it is and run the zipper foot up next to it. When you open the the seam up is should now look like this:
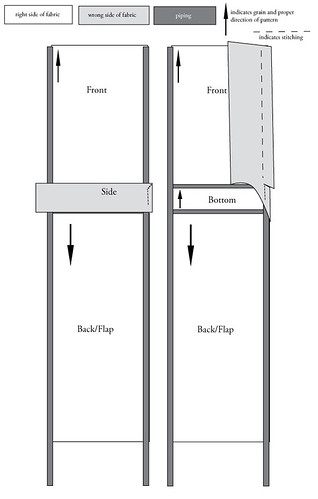
7. Do exactly the same thing again to attach the bottom to the back/flap piece. WARNING: this is where I made my mistake. If you are using a directional pattern, make sure that it is going the correct direction. This means the
opposite direction from the way it goes on the front piece. Here is a drawing which will hopefully make this clearer:
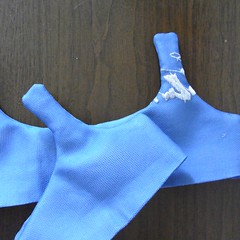
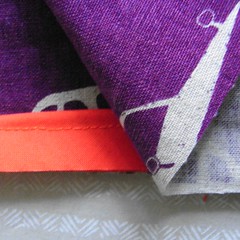
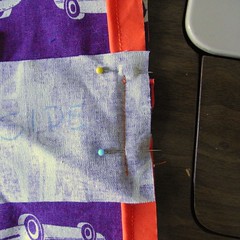
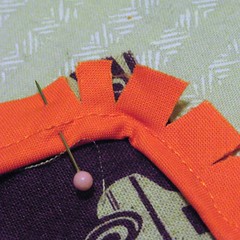
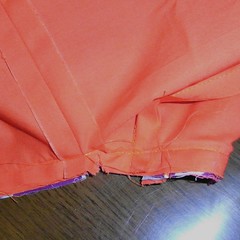
8. Now you need to attach the sides. This part is a little trickier. First, you need to lay your piping out from the top of the front piece all the way along the edge of the bag and turning the corner of the front flap to make sure you have it in the right place when you put the sides on. Pin it in a few places. Now sew a side piece to the side of the bottom piece, sandwiching the piping as you did before, except that this time you will have lots of piping hanging out on either side. Leave 5/8” unsewn on either end of this seam:
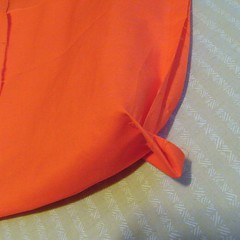
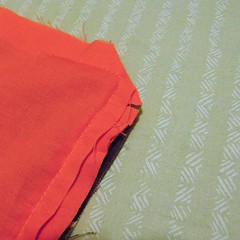
Now you are going to need to turn the side and sew it to the back, sandwiching some of the piping that you left hanging out on that side. In order to do this cleanly, you need to clip a diagonal cut from the corner of the side piece toward the end of the seam you just made:
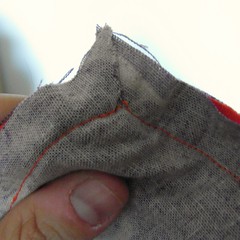
The cut will allow you to turn the fabric and pin it to the back without making a giant lump. Pin and sew to the back, sandwiching the piping. Do this again for the front. Now when you turn it right side out, you will have something that looks like this:
Do this again on the other side.
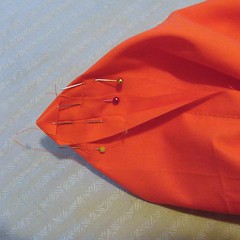
9. Now take all the rest of the piping that is hanging out of the end of the side seam and pin it along the top of the flap, clipping the raw edge of the piping where you need to turn corners:
Sew this piping down. (You aren’t sandwiching it yet, so don’t get worried).
10. Take a new piece of piping and pin it around the top edge of the body of the bag. Sew this piping down.
11. Now you need to construct the lining. Fold the wider part of the lining to line up with the places where it cuts in. Sew these side seams. Now, pin each bottom corner of the lining to itself to form a flat triangle. Sew along the bottom of the triangle to make a 2 1/2” seam:
So now your lining is the same shape as your bag outside.
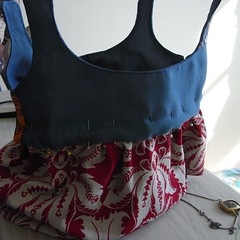
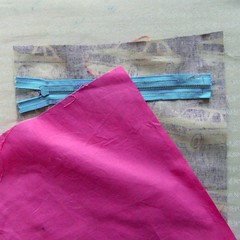
12. The next thing to do is to stick the the bag outside, right side out, into the lining, which is still inside out:
Pin the lining to the bag around the bag opening and the edges of the flap. You should be sandwiching the piping you pinned to the outside of the outside of the bag a few steps back. Sew all the way around the raw edges, leaving an approximately 4” area at the end of the flap that you down sew shut. This hole will allow you to turn the back right side out and give you a way to put on the other side of your snap.
13. Now you need to make some clips to avoid lumpiness. First find the place where the flap comes off the body of the bag. Clip diagonally into both of those corners:
14. Next cut off the seam allowance at the corners of the flaps:
15. Ok. Now you have to turn the bag right side out, passing all of it through the hole you left at the end of the flap.
Now your bag should look basically done, except for the strap and the hole at the end of the flap.This is the point at which I realized that I had done this whole bag with the back/flap part turned the wrong way, so now the lovely pattern of cars on my bag was upside down! Too late to turn back . . . .
16. So now you need to figure out where the other half of your snap goes. Line up the flap with the bottom of the bag and mark where the indented part of the snap is. Reach into the hole in the flap and insert that half of your snap. (Different kinds of snaps insert differently, which is why I haven’t included instructions for this part. When you are at the store, ask how the snap goes in and if you need to get a special tool to do it. The ones I used did not need a special tool, but some have a thing you put against the back of the snap to hammer it closed.)
Awesome. You are almost done.
17. Close the hole in the flap by hand stitching it down.
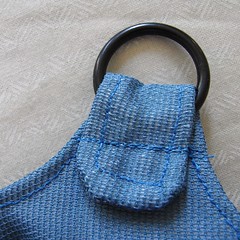
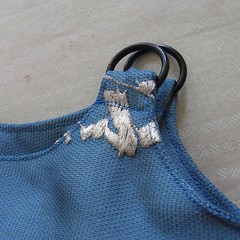
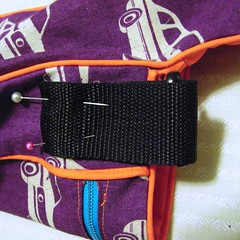
18. You still have to put on the strap. Thread the square ring onto a short length of webbing and make that into a loop. Pin down the loop and sew it to the side of the bag.
Now sew a long piece of webbing (about 5 feet) and sew one end of it around the center post of the triglide. Next thread the other end through the square ring that its already attached to the bag. Then pass that end through the triglide (looping it back on itself). Finally, sew the end to the other side of the bag. (read a tutorial on adjustable straps
here)
Voila! Your bag is complete.