Saturday, August 30, 2008

Buttons, wire, ribbon, and chain — what can I make this morning out of stuff I have lying around the house?

Button and Ribbon Choker

I was perusing expensive catalogs the other day when my attention was caught by a necklace made from what looked like large plastic chain links and vintage buttons. Now I didn’t have any plastic chain, but I had just about all the other components I thought I needed. The free craft project! Free, at least, in that I completely forgotten when I got the button, wire, ribbon and chain I planned to use.

Here's the original necklace, which I saw in Anthropologie's catalog:

[hmm . . . apparently flickr yanked that image, but my necklace is cooler anyway. hey, anthropologie, you didn't want me doing free advertising for you? stupid you.] --revised 3/12/2010

To make my version, here's what you'll need:
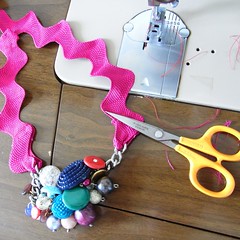
pliers
wire cutters
a sewing machine, or a needle and thread
chain with larger links
ribbon
buttons and beads
seed beads

Here's how to do it:
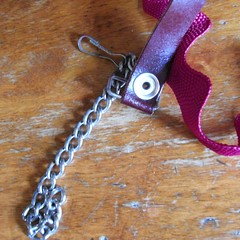
For the part of the necklace that requires links, I decided to use part of an old wallet chain - the kind that lets you attach your wallet to your belt. In 1994 we thought these chains made us look like toughs, but it’s not 1994 anymore, thank god. I had one I would never wear again, so I took out a link and used half for this project.

Button and Ribbon Choker

Buttons I have galore.

Button and Ribbon Choker

Some are from my mom’s old stash, some are from an awesome fabric store on the south side of Chicago. I thought at first that the best kind of button would be the kind with a central metal post, basically a bead with a loop on the back. I didn’t have all that many of that shape, so I also got out a plastic necklace I had broken the other day, and mined some beads from there.

Button and Ribbon Choker

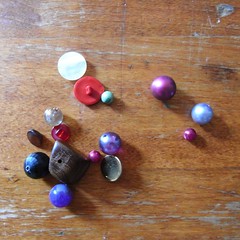
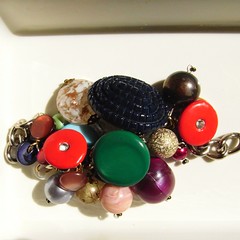
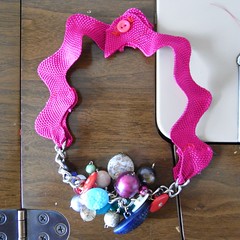
As I started putting beads on the chain, I realized that a mixture of bead-like buttons and larger flat buttons (the kind for a winter coat) actually made a more pleasing cluster on the chain.

Button and Ribbon Choker

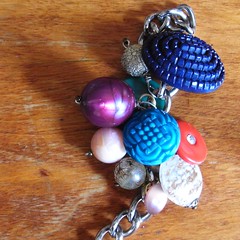
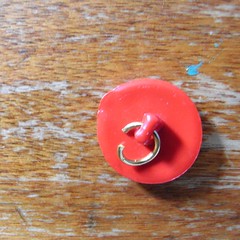
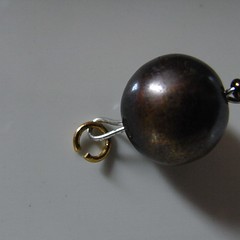
Flat buttons can be attached to the chain with a single jump ring (I used cheap non-silver ones, since the chain isn’t silver anyway). Bead buttons also take a single ring.

Button and Ribbon Choker

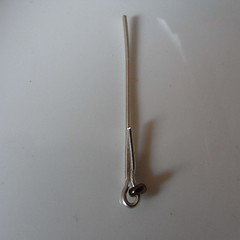
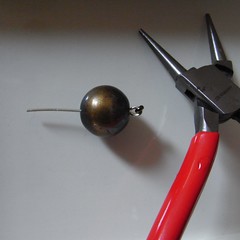
Actual beads need a wire wrap (or earring pins would work really well, but I didn’t have any). I put a seed bead in a loop of wire to hold the bottom of the bead, wrapped a loop at the top, and then attached that to the chain with a jump ring.

Button and Ribbon Choker

Button and Ribbon Choker

Button and Ribbon Choker

This process took a lot more beads and buttons that I had originally planned on.

Button and Ribbon Choker

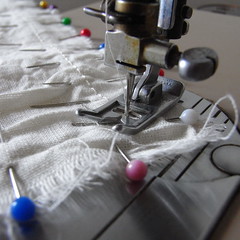
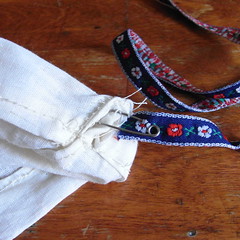
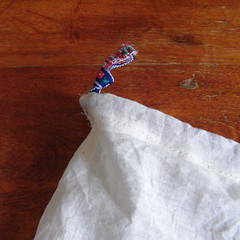
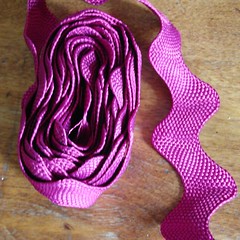
For the part that goes around your neck I used wide ribbon. Lots of different kinds would work for this. The best color I had was in the form of enormous rick-rack.

Button and Ribbon Choker

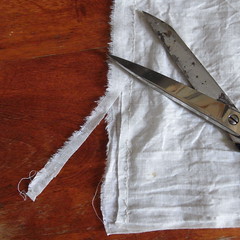
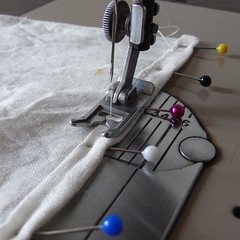
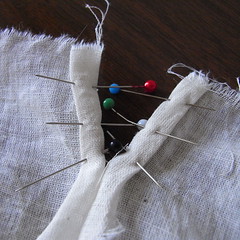
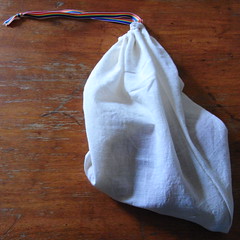
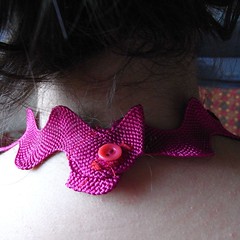
First you pull the ribbon through the end of the last chain loop, fold it over and sew it down. Then hold the necklace up to your neck, look at how long you want it to be, and mark the ribbon at the center of the back of your neck. Cut it about an inch past the mark, fold it under and sew. Do the same on the other side, but make that piece longer - you want it to overlap the first piece by about an inch.

Button and Ribbon Choker

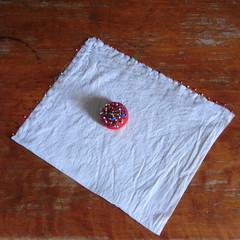
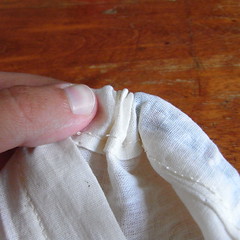
Now, find a nice small button you want to see holding the necklace closed. Make a button hole near the end of the longer ribbon. Sew your button to the end of the shorter one.

Button and Ribbon Choker

(I made a pretty half-assed button hole. If you want to see how to do it correctly, look here: http://www.purlbee.com/buttonhole-tutorial/)
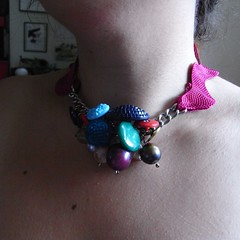
Finished!

Button and Ribbon Choker

Now I think I’m going to do one with felt beads from Chinatown . . . .

Wednesday, August 27, 2008

Cheap and Easy Produce Bags That Won't Destroy The Planet

Finished bag with potatoes

We just joined this hippie food coop, and I’ve been feeling guiltier than ever about the absurd number of plastic bags I use. Even though I’m pretty good about bringing reusable shopping bags, I still end up with more plastic bags than I can fill with cat box leavings. Already, I was having nightmares about the Great Pacific Garbage Patch. Now that I shop at a place that sells nutritional yeast in bulk, posts notices on why they don’t carry Coca-Cola products, and offers workshops in past-life regression and community acupuncture, I feel like Judas every time I reach for one of those clear plastic bags in the produce aisle.

I’m too broke for therapy, so I found a couple yards of plain muslin leftover from another project and set about making washable, reusable, drawstring produce bags. There’s no need to use muslin. I’d like to try using nylon, ideally in a crazy pattern. If you’re getting rid of an old dress with a lining, you could use that. Any fabric will do, so long as it’s light enough not to add to your bill when your organically-grown, fairly-traded, Waldorf-school-educated bok choy gets weighed.


What you’ll need:


Light-weight material, approximately double the size of your finished bag.
Ribbon or string — a shoestring, even — about twice as long as the top of your bag
A sewing machine or some patience (this is totally do-able by hand)
Thread (matching, if you want to be dull)
Pins — mostly straight, one safety


How To Do It:


1. Cut a long, rectangular piece of muslin or other light-weight fabric. About 14"x34" works well. The bag in these pictures was made from a more square piece — about 14”x24” — because that was the size of fabric I had left. Depending on the proportion of your piece of cloth, you may end up folding it differently in step 2.

Step 1b
To get a straighter edge on muslin or calico, make a small cut to begin, and then tear the fabric, rather than cutting the whole distance. Pull evenly on both sides. Feel like a yardage store badass.


2. Fold your fabric in half. You want to end up with a bag that is deeper than it is wide. Pin the sides or side and bottom -- whichever way will leave a short side open to be the top of the bag. The pictured bag has side and bottom seams, but the others I’ve made have had two side seams. It’s not a federal case.

Step 2


3. When you start sewing the side seam, leave an 1.5-2” unsewn at the top. The drawstring will come out of its tube here, eventually. If you’re doing two side seams, you only need to do this on one side.

Step 3
Here is an example of me only leaving an inch, and having to fudge later. Leave an inch and a half.

Sew the sides or side and bottom, leaving 5/8” seam allowance.

Step 3a

If you’re sewing a side and a bottom, you’ll have to go around a corner. Make sure the needle is piercing the fabric, lift the foot, reposition the fabric, and lower the foot.

Step 3b


4. TOTALLY OPTIONAL. If you want to show off — or, if like me, you want to try to learn a new sewing technique on a project that doesn’t have to look good — you can fancy it up by flat-felling the side seams. These are rutabaga bags, not your wedding dress, so I figure why not practice on ‘em? But you can just motor ahead to step 5 if you prefer.

Snip most of the seam allowance off of ONE of the pieces of fabric you just sewed together.

OPTIONAL Step 4
(The seam is a bit messy because I was having trouble with the tension on my machine. Repeat after me: This is not my wedding dress.)

Pin the long (5/8”) seam allowance over the snipped side, folding its edge under so you dont’ have a rough edge showing.

OPTIONAL Step 4a

Stitch along the folded edge.

OPTIONAL Step 4b


5. Finish the open top of the side seam — the one you started 2” down. (If you’re me, realize you forgot to leave it open, swear, and tear out the top 2” of one of those side seams.)

Fold the edge double, pin it, and sew so that the opening of the drawstring tube will not have annoying rough edges.

Step 5


6. Fold over the top of the bag to make the drawstring tube. (Double fold at the bottom, so there won't be a rough edge.) Sew along the bottom fold, being careful not to sew the two sides of the bag together.

Step 6


7. String that sucker up.

Cut ribbon or string twice as wide as your bag’s top, plus about six inches.

Step 7

Turn the bag right side out. Attach a safety pin to one end of the ribbon, and send it into the drawstring tube.

Step 7a

Work the ribbon through the tube by pushing the safety pin and scrunching the fabric over it.
Step 7b

When you’ve got the ribbon through, tie the ends together so you don’t have to restring the bag every dang week.

Step 7c


8. TA-DA!

Full of potatoes!