I saw a really wonderful necklace last winter when I was visiting Cape Town at Mungo and Jemima on Long Street. The designer was a woman in the UK, and I would post her info here if I could remember what it was, but I can't.
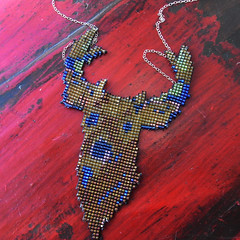
The necklace was a deer's head woven out of seed beads. I really wanted to buy it, but when I did the calculation from Rand to US $ I realized it was $200! Seed beads? $200? I could make that for about $2, I thought. Well, I eventually did, but it took about a year, and the longer the project lingered on my desk, the more reasonable $200 started to seem.
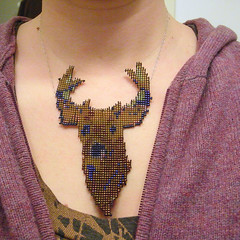
However, if you are up for a time-consuming sort of craft project (i.e. if you think knitting is an OK pursuit) this is a way to make an expensive looking accessory for very little money. I wore it to a party yesterday and lots of people seemed to think it was awesome. (Disclaimer: my partner thinks this is the ugliest thing ever, but what the heck?)
you will need
tracing paper
colored pencils
photo or print out of image you want on the necklace
thread or nymo
seed beads (all the same size/shape - flat edged are best)
beading needles
wax (optional)
beading frame (or box - although I recommend making a frame)
how to do it
First, you need to make a design. All the necklaces I saw like this were essentially Y shapes -- deer with antlers, birds with wings up, things like that -- or round shapes like flowers. I loved the deer, so I did my own version of that.
Sizing the design was the biggest issue. I wasn't sure how many beads across and down equaled an inch square once the thread spaced out the beads. It turned out that 15 beads across = 1 inch, and 10 beads up and down = 1 inch.
1. Draw a grid onto a piece of tracing paper. The grid should be composed of rectangles, not squares, to account for the difference in number of beads side to side versus up and down.
2. Find a photograph somewhere (pictures of animals on Flickr abound).
3. Decide how big you want your necklace to be (say, 2 inches high), go to your tracing paper and (using the example of my gauge of 15 x 10) count out 30 rectangles up and down on your grid and measure that distance.
4. Re-size the photograph in a photo editing program so that the animal is the height you just measured.
5. Print out your photograph.
6. Decide on the number of colors of beads you intend to use. I only had a certain number of small flat edged seed beads, so I used those. Pick out the same number of colored pencils that roughly match the beads in value and color.
7. Tape your tracing-paper grid over the photograph, and color in each rectangle with the closest color of color pencil. Hue doesn't matter as much as value. For instance I used navy blue for black and pink for tan on my deer.
8. Take the tracing paper off the photo and gaze at what you have done. Does it look like the animal? If yes, proceed. If no, maybe you need a more iconic or more contrasty photograph.
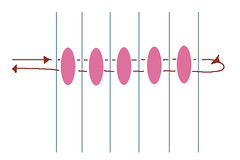
9. Here comes the fun part. Time to make the loom. First, count how many columns of beads across you've got on your image. You'll need that many warp threads plus two.
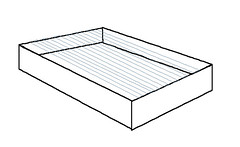
10. Find something that can act as a frame. I used an old 4x5 film box, but I would not recommend following my example. It will work better if a) it doesn't bend at all and b) it doesn't have a bottom like a box, but instead is really just a frame. Hammering together 4 pieces of molding into a small frame would do nicely.
11. Wrap your thread tightly around the frame enough times to make the number of warp threads you counted in step 9.
12. Thread a beading needle with thread, tie that thread to one of the middle warp threads. You're going to start in the middle and work out to one side first, because that leaves the hanging tail of thread in a better spot.
13. I followed this tutorial to get started: http://www.beadiefriends.com/LoomworkInstructions.htm
14. Now you just bead like crazy until you're done, following your pattern. Here are some pitfalls I encountered:
- My warp thread was too thick, so when I got done I had to finish the edges with glue because I couldn't weave my ends back through the beads. Use the same narrow thread you use for the weft. You should be able to pass at least three strands of thread through the hole on one bead.
- I kept forgetting to start new threads in the middle of the row. Knots on the outside look ugly.
- My frame bent because it was made out of cardboard and the warp threads got loose. Use wood or a real bead frame.
16. Sew chain to the back and attach a clasp to the ends of the chain.
WOO! That took for freaking ever!