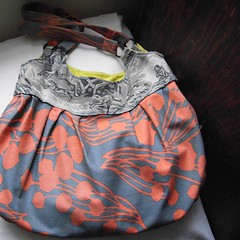
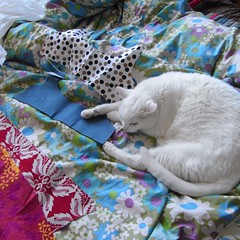
I made this handbag about a year ago, and since then people have been asking me about it all the time. It’s pretty easy to make, although a little time consuming, and is that magical combination of hip and comfy. It has a lot more room in it than it looks like it should (for example I can fit a bottle of wine in the bottom). I’ve always been planning to make myself another one in a different fabric, so I finally did that for the purposes of this blog.
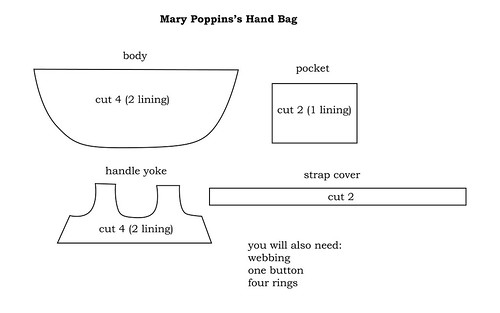
The pattern I’ve posted here is pretty impressionistic, I.e. Not to scale and not very detailed. That’s because it doesn’t really matter if you get the size or proportions exactly right. Just use my pattern as a guide and make your own pattern pieces for whatever size bag you think you want. I’ve actually made the same bag in beach bag size, and it worked wonderfully like that too. Just remember that the body of the bag is going to end up seeming a lot smaller when the bag is done, so don’t skimp on the size of that.
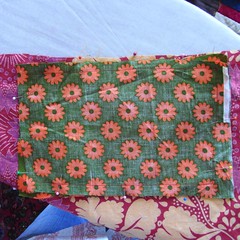
The idea is that you have different patterns of fabric on the inside, the outside and the pockets. For both of my purse size versions of this bag, the linings for the yoke and the body are different patterns, which I think looks cool. Plus, this is a great way to make something out of bits of fabric that are really too small for anything else.
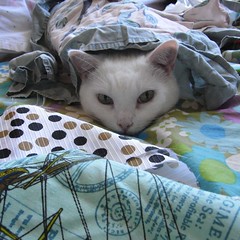
Also - let me stress the importance of having a helper for this project:
 You will need:
2 heavy weight fabrics (canvas or upholstery material)
2 to 4 medium to light weight fabrics
1 button
About 50 inches of 1/2 inch webbing
4 O rings (these can be from curtain hangers)
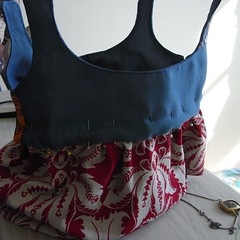
How to do it:1. First cut out the pieces. You want the yoke outside and the bag outside to be of heavier fabric. Ideally, the yoke outside should be the heaviest of all. If it isn’t you can use a little interfacing to make it stiffer. For the first bag I made, I used upholstery fabric for the yoke, canvas for the body, and quilting cotton for the pocket and lining pieces.
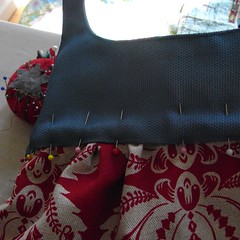
2. Next sew together the outside yoke pieces at the side edges, right sides together. This is the first mistake I made on the purse I made for this blog post. Instead of doing that, I lined each half of the yoke separately and then had to figure out how to put the two sides together later. Either way will work, but sewing the outsides together first is less of a pain.
3. Sew together the yoke lining pieces together at the side edges, right sides together. Now sew the yoke outside to the yoke lining, right sides together, along the top edge (the edge that has the curves and shapes for the handles). Clip curves and trim corners.

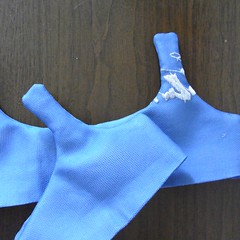
4. Turn the yoke right side out. Press under the raw edges of the lining and outside along the bottom edge. Topstitch along the top edge of the yolk.
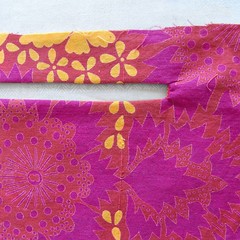
5. Now deal with the pocket. The pocket goes into the lining. So, first put one pocket rectangle, centered horizontally, near the top of one of the lining pieces. Pin it down and sew a long narrow rectangle. (This step is similar to step three of the Boulevardier bag) Cut a two ended Y into the rectangle and then turn the pocket fabric through the hole you just made. Press.
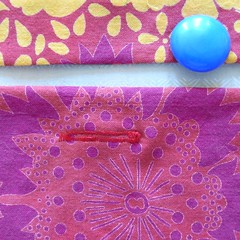
6. Now make your button hole, horizontally centered near the top of the pocket. (Button tutorial here
http://www.purlbee.com/buttonhole-tutorial/).
7. Now, pin the other side of the pocket to the pocket piece you pushed through the hole, right sides together, and sew all the way around.
8. Now sew your button onto the back fabric of the pocket.
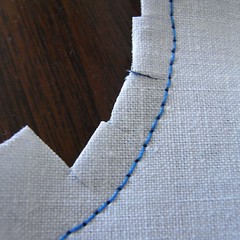
9. Next sew your two bag body outsides together along the curving edge, right sides together. Do the same with the bag body linings. Clip a few places along the curve. Turn the outside right side out and then slip the lining into the outside.
10. Sew very long basting stitches all the way around the top edge on each side. Use these stitches to gather the fabric. Gather it so that it becomes the same circumference as the bottom of the yoke.

11. Insert the top edge of the bag body into the space between the lining and the outside of the yoke and pin.
12. Sew all the way around, as close to the edge of the yoke as possible. The body is done!
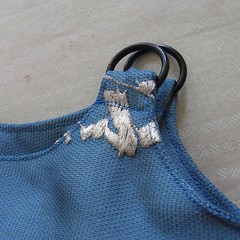
13. Now you need to attach the rings that the handles will go through. I actually used curtain hanging rings for these, because I had them around the house. You can also go to a notions store and get various sizes and finishes of ring. To attach them, just run the top of each sticky-uppy part of the yoke through a ring and sew it to itself.
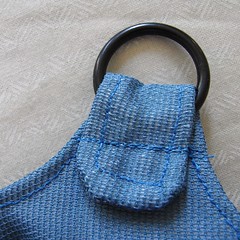
14. Ok, all that’s left to do is make the straps. You want to use fairly heavy fabric for these, because they will get the most wear and tear. Essentially, you want to make a tube of fabric, run the webbing through the tube, and then top stitch both long edges. This is annoying no matter which technique you use. The first time I did it, I made a tube, turned it right side out, and then fed a strip of webbing through it using a large safety pin in the webbing to pull it along. Another way you could try it would be to wrap the webbing in the fabric and then sew it down.
I haven’t made the straps to the new bag yet, because none of the fabric I have looks right with it, so photos of the finished new bag will be coming soon!