Sunday, June 7, 2009

Lovable Monsters

sweater bird and monoclepod

I saw these awesome monsters by Junker Jane on flickr and had to make some myself. I cut up some old clothes to make Sweater Bird . . .

sweaterbird

. . . and Monoclepod

monocle

Sunday, May 31, 2009

Birdies

embroidered bird

I was browsing through craft groups on flickr and came across some wonderful embroidered birds by Anita. It set me thinking about where I could use such motifs myself. I decided I would try to cover up some egregious coffee stains on a shirt I bought at the Bharatiya Dress Shoppe and only managed to wear once before the coffee dumping incident. Here are the results:

embroidered birds

embroidered bird

Sweet Tea liked it, so now I've been commissioned to put a jellyfish over the stain on her pleated skirt.

I looked at the Bantom Step-By-Step book of Needle Craft by Judy Brittain (1979) to figure out stitches to use. Mostly I just did back stitch, but I also found some handy stars called 'star filling stitch.' I also did french knots, which are actually easy, but impossible to read about. If you want to learn how to do them, watch one of the many instructional videos on youtube.

This project did earn me some bizarre and unhappy looks on the subway. At first I couldn't figure out why, since knitting doesn't phase anyone at all. One of my coworkers thinks it's the presence of the very sharp needle. I had no idea it was so easy to indimidate people. Watch out folks, I've also got a bottle opener on my key chain. Boo!

bird blouse

Sunday, March 15, 2009

Sweater Finished After 20 Years!

Buttony Sweater

Actually, I've just had this yarn for 20 years. My mom bought it for me in middle school to make a sweater. Unsurprisingly, I flaked out on the project. Years later I made a scarf with some of the yarn, and 5 years after that the scarf got stolen out of the US postal system. Finally in December I started this sweater for myself and I actually finished it. Amazing.

The pattern is free. If you aren't one of the 536 people on Ravelry who have already made this sweater, here's the pattern. It's pretty bare bones in terms of number of stitches, size and placement of neckline, but it's also very easy.

The most fun part was choosing the buttons. I used a bunch of buttons I took from my mom's stash last time I was home.

Of course you can always use a classic cat fastening:

Buttony Sweater

In terms of satisfying and fast knitting, the Buttony pattern is definitely recommended.

Buttony Sweater

Saturday, March 14, 2009

hot enough to melt

enamel pendant

I got an enameling kiln! Enameling is probably the most fun craft I've tried to date. Despite the 4 days of glass inhalation before I got a respirator, setting a minor fire, and accidentally melting something I thought was brass (whoops) I'm still obsessed.

Here are some things I've made so far.

First, I just tried regular enamel on copper.
enamel pendant

Then I got wacky and tried embedding watch gears into the enamel. This works! However, it's kind of a crap shoot, because it's not always easy to tell what the parts are made out of, so sometimes they melt out of shape.

There's a great tutorial out there by Copperheart that got me started.

A longer post on this coming soon!

enamel pendant

Saturday, February 28, 2009

a little bit wearable art, a little bit rock and roll

arty rocknroll

A few years ago I wanted a vintage-looking silk-screened t-shirt with a high-contrast face on it. I do know how to silk screen (courtesy of my print-maker mom), but I don't have silk frames in my tiny tiny apartment, nor do I have all the various chemicals, the funky-smelling greasy ink, the squeegees, the ninety miles of cat-free horizontal space to lay out the drying prints, etc. So, I came up with a way to make something that looks like it was silk-screened, but only involves a tiny tub of fabric paint, one shirt, and a paint brush.

You will need:

Tracing paper
Pencil
A photograph of something you want on the T-shirt, at the size you want it
An x-acto knife
A smallish paint brush
Opaque fabric paint (I like Setacolor or Tulip brand)
Tape
Cardboard

How to do it:

First, I need to explain a few things about the materials, because several variables are quite important. You must use real tracing paper, not a substitute. I tried this once with vellum, and it was a disaster. You should also look for the most viscous paint available. The thicker and goopier it is, the better it will maintain the shape of your stencil and the more opaque it will look. Think about the color of the paint vs the color of the shirt. Darker paints on lighter fabrics are easier to deal with. If you have really really opaque paint, you can do light paint on dark fabric, but this is more likely to come out uneven and blobby. Finally, think about image size, shirt stretchiness, and where the image will end up on your chest. If the shirt is very stretchy and tight, and the image is right over your boobs, the whole thing is going to get stretched way out of shape.

arty rocknroll

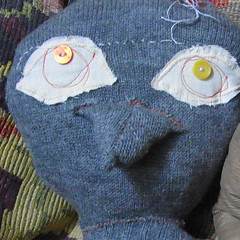
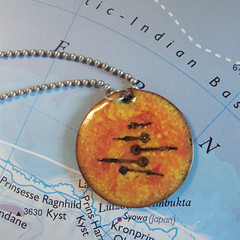
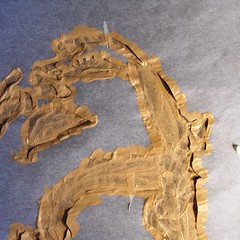
1. Ok, find an appropriate image you want to transfer to your shirt. Several qualities are important that you might not think of right off the bat. The image should be contrasty - i.e. lots of very light areas and very dark areas, but not much in the middle range. This will make it much easier to make a comprehensible stencil out of it. The image should be fairly iconic, meaning a recognizable object. For example, a human face is very recognizable as a human face, even if sketchily drawn. An old rotary telephone is recognizable. An example of something that is NOT recognizable is a high-contrast photo of a Vietnamese pot-bellied pig. Yes, I tried this once, and the image on the shirt looks nothing like a pig and a great deal like Lenin.


arty rocknroll

WRONG!!

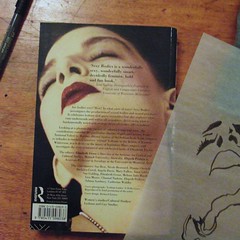
2. If you found your picture on the internet, blow it up or shrink it down to the size of what you want on the shirt and print it out. If you are using books or magazines, look for something that is already the right size.

3. Put your tracing paper over the image and tack it down with a little tape to keep it from moving.

4. Now, trace your image. Don't use lines. Instead, color in only the dark areas with solid black and leave everything else alone. This process can be aided by using a thick, dark marker (like a bold sharpie). You are going to be cutting out the dark areas later, so don't make them too tiny or intricate.

arty rocknroll

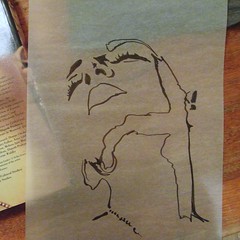
5. Next, check to make sure your dark blobs make a recognizable image. Take the tracing paper off the image and put a white piece of paper behind it. Ask yourself, "if I hadn't just been staring at this for half an hour, would I know what it was?" If the answer is yes, proceed. If not, start over, probably with a different image.

6. Now cut out all of your little blobs with your x-acto knife. This takes a while. Make sure you have a couple of new blades around. A dull knife will rip your paper.

7. Tape the tracing paper stencil to the shirt. You want everything very flat at this point. I usually put a big piece of cardboard inside the shirt to give myself a flat surface. Just make sure that the shirt doesn't have to stretch to go around the cardboard.

8. Prep your painting tools. The fabric paint I recommend cleans up with water, so get two small containers of water, one for cleaning your brush, one for cleaning up potential mistakes on the shirt. Also get a clean rag and a few clean pieces of paper towel.

9. Paint over your stencil. Make sure that you are careful not to stick the brush under the edges of the tracing paper - it should stay flat down on the shirt. This is why you must use tracing paper and not something like vellum or plain paper, the tracing paper tends not to absorb the water, so it doesn't wrinkle or curl up. Be sure to apply the paint evenly.

arty rocknroll

10. When you are finished, carefully remove the tape and peel back the stencil. The stencil can be saved for future use on other shirts. Put the shirt somewhere to dry where your pets won't use it as a racetrack. When it's dry (this usually takes at least 8 hours), turn it inside out and iron it with a hot iron to set the ink.

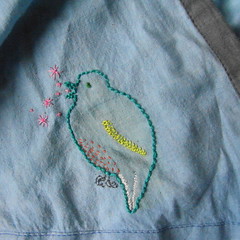
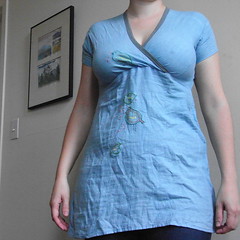
Hey presto, it's a shirt with a thing on it!

Sunday, February 1, 2009

Recycled Shirt

Raglan shirt from tights

This winter a lot of Sweet Tea's tights went kaput. She had several pairs of sweater tights that all went at once. It was a bloodbath: holes in feet, holes in the crotch, total elastic failure. In the aftermath we figured out that you can make pretty cute legwarmers from a pair of sweater tights. But there are only so many pairs of gray legwarmers a person needs. So today I took 3 more pairs of dead tights and made them into the raglan shirt you see here. Doing this is fairly easy, and the stretchiness of the material makes for a forgiving fit. You just have to be OK with a little unevenness and use a trim-and-adjust-as-you-go philosophy.

You will need

three pairs of tights
thread

How to do it

1. First you need to make some flat pieces of material out of two of the pairs of tights. Cut the legs off and apart from one another. Cut the feet off the legs. Cut each leg lengthwise and flatten it out.

2. For each pair, sew each flattened leg to the other legnthwise. If you don't have a serger on your machine (which I don't) lap the edge of one piece of fabric over the edge of the other with the right sides of both pieces facing up. Sew down the middle of the overlap with a loose zig zig stitch. Then go back to the top of the seam and sew the raw edge of the top piece of fabric down with a tighter zig zag stitch.

3. Now you have two rectangles that will form the front and back of your shirt. Cut them out roughly according to this pattern:

Raglan shirt pattern

4. Cut out the small triangles shown in the pattern from scraps (the feet or whatever you have left). Sew these triangles to the sides of the front at the top of each side, abutting the curve for the sleeve insertion.

5. Sew the front to the back.

6. Cut the legs off the remaining pair of tights, but don't cut them open. Cut off the feet. Shape the top of each leg according to the pattern above.

7. Sew each leg to the curved arm opening formed by the front and back.

8. Have someone else put the shirt on and neaten up the curve of the neck.

Raglan shirt from tights

Monday, January 12, 2009

Wanna buy a watch?

Here are a few more of these things. I'm thinking of hawking them around to some of the stores in my neighborhood, since Etsy is not producing results.

watch pendant

watch pendant

watch pendant

watch pendant

Sunday, January 11, 2009

Is it a snail?

spiral hat

The Christmas push is finally over, so I can start putting up pictures of what I made for everyone in my family (whether they wanted it our not). This spiral hat was a fun and quick knit. The pattern is from Elizabeth Zimmerman's The Opinionated Knitter and can be done in a night, or a day or two if you are a beginner. This hat can turn out looking really different depending on what you do, so if you want it to look like the pictures here, here's what to do:

  • Use fat yarn. EZ calls for something that is no longer manufactured, so I tried holding two strands of Manos del Uruguay together, which worked just fine.
  • Do the backwards loop increase, like she says. I tried a different increase for the first hat I made and it looked cool, but not at all like the picture.
  • Sew the edges of the garter-stitch portion together. The pattern is a little vague on this point, but it'll look odd if you don't.
I actually found this pattern first on google books, because the portion of the book they were displaying for free included it. This doesn't seem to work anymore, but The Opinionated Knitter is terrific - definitely worth buying.

spiral hat

And here's my grandma looking pleased with her version (or possibly being held up):

RIMG0861