
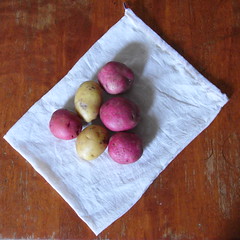
We just joined this hippie food coop, and I’ve been feeling guiltier than ever about the absurd number of plastic bags I use. Even though I’m pretty good about bringing reusable shopping bags, I still end up with more plastic bags than I can fill with cat box leavings. Already, I was having nightmares about the Great Pacific Garbage Patch. Now that I shop at a place that sells nutritional yeast in bulk, posts notices on why they don’t carry Coca-Cola products, and offers workshops in past-life regression and community acupuncture, I feel like Judas every time I reach for one of those clear plastic bags in the produce aisle.
I’m too broke for therapy, so I found a couple yards of plain muslin leftover from another project and set about making washable, reusable, drawstring produce bags. There’s no need to use muslin. I’d like to try using nylon, ideally in a crazy pattern. If you’re getting rid of an old dress with a lining, you could use that. Any fabric will do, so long as it’s light enough not to add to your bill when your organically-grown, fairly-traded, Waldorf-school-educated bok choy gets weighed.
What you’ll need:
Light-weight material, approximately double the size of your finished bag.
Ribbon or string — a shoestring, even — about twice as long as the top of your bag
A sewing machine or some patience (this is totally do-able by hand)
Thread (matching, if you want to be dull)
Pins — mostly straight, one safety
How To Do It:
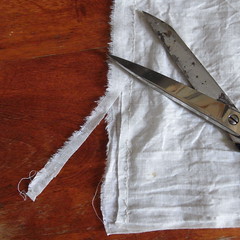
1. Cut a long, rectangular piece of muslin or other light-weight fabric. About 14"x34" works well. The bag in these pictures was made from a more square piece — about 14”x24” — because that was the size of fabric I had left. Depending on the proportion of your piece of cloth, you may end up folding it differently in step 2.

To get a straighter edge on muslin or calico, make a small cut to begin, and then tear the fabric, rather than cutting the whole distance. Pull evenly on both sides. Feel like a yardage store badass.
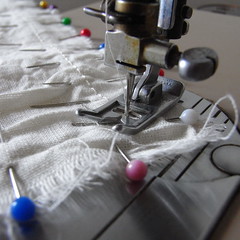
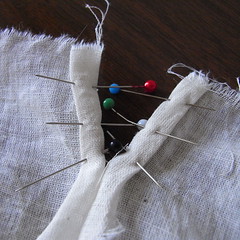
2. Fold your fabric in half. You want to end up with a bag that is deeper than it is wide. Pin the sides or side and bottom -- whichever way will leave a short side open to be the top of the bag. The pictured bag has side and bottom seams, but the others I’ve made have had two side seams. It’s not a federal case.
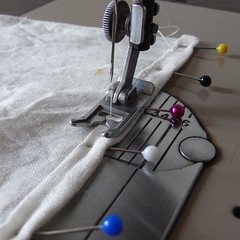
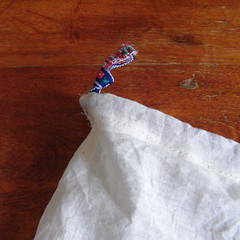
3. When you start sewing the side seam, leave an 1.5-2” unsewn at the top. The drawstring will come out of its tube here, eventually. If you’re doing two side seams, you only need to do this on one side.

Here is an example of me only leaving an inch, and having to fudge later. Leave an inch and a half.
Sew the sides or side and bottom, leaving 5/8” seam allowance.

If you’re sewing a side and a bottom, you’ll have to go around a corner. Make sure the needle is piercing the fabric, lift the foot, reposition the fabric, and lower the foot.
4. TOTALLY OPTIONAL. If you want to show off — or, if like me, you want to try to learn a new sewing technique on a project that doesn’t have to look good — you can fancy it up by flat-felling the side seams. These are rutabaga bags, not your wedding dress, so I figure why not practice on ‘em? But you can just motor ahead to step 5 if you prefer.
Snip most of the seam allowance off of ONE of the pieces of fabric you just sewed together.
(The seam is a bit messy because I was having trouble with the tension on my machine. Repeat after me: This is not my wedding dress.)
Pin the long (5/8”) seam allowance over the snipped side, folding its edge under so you dont’ have a rough edge showing.

Stitch along the folded edge.
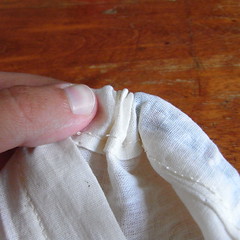
5. Finish the open top of the side seam — the one you started 2” down. (If you’re me, realize you forgot to leave it open, swear, and tear out the top 2” of one of those side seams.)
Fold the edge double, pin it, and sew so that the opening of the drawstring tube will not have annoying rough edges.
6. Fold over the top of the bag to make the drawstring tube. (Double fold at the bottom, so there won't be a rough edge.) Sew along the bottom fold, being careful not to sew the two sides of the bag together.

7. String that sucker up.
Cut ribbon or string twice as wide as your bag’s top, plus about six inches.

Turn the bag right side out. Attach a safety pin to one end of the ribbon, and send it into the drawstring tube.
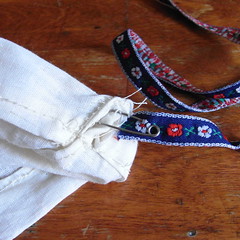
Work the ribbon through the tube by pushing the safety pin and scrunching the fabric over it.
When you’ve got the ribbon through, tie the ends together so you don’t have to restring the bag every dang week.
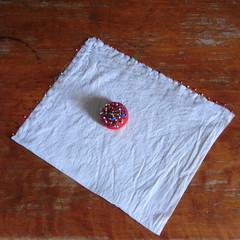
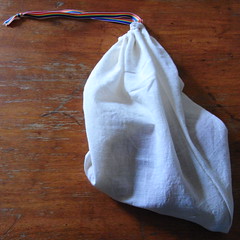
8. TA-DA!
No comments:
Post a Comment